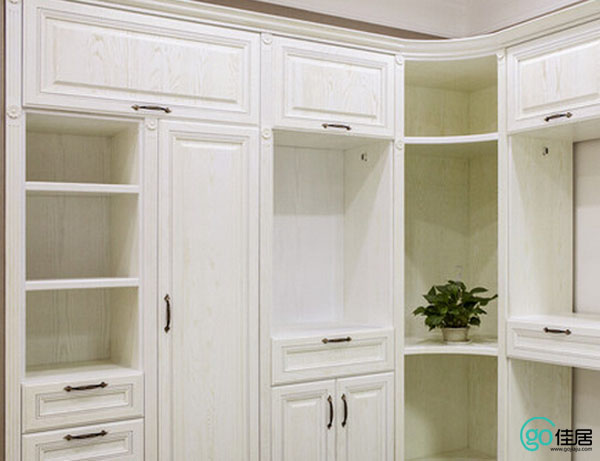
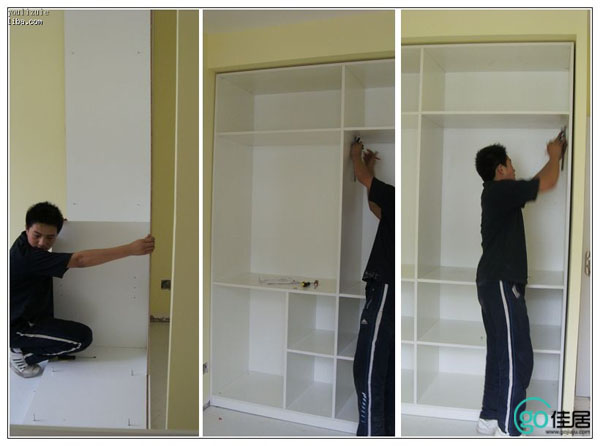
The whole wardrobe is nowadays more choice of furniture, not only the wardrobe itself is beautiful and practical, important disassembly and assembly is convenient, you can buy a beautiful wardrobe, you can put it up, but it will not fit in a few, this is also a troublesome, wardrobe What is the installation procedure ? Voice Yang furniture teaches you the detailed instructions for installing the wardrobe . The first step: start the installation Pad the floor with a cloth pad, start assembling from the wide side plate on one end of the wall, and lay the wide side plate flat on the floor (a distance of 700 mm from the rear wall). First, place the three-in-one rubber stopper plate on the cloth, check the hole spacing and the drawings, and install a three-in-one single link. Attention is paid to the product structure. All three vertical and horizontal intersecting fixed positions have a three-in-one connection. The three-in-one boring bar is mounted on the embedded part of the connecting plate. The loading depth is based on the rubber sleeve in the lower part of the boring bar. In principle, the assembly is based on the middle of the assembly to the surrounding, each plate is surrounded by a boring bar hole and an eccentric hole, align the plate with the boring bar to the boring bar hole in the corresponding plate. Insert the hole, from the eccentric hole can be seen about the mast head about 5mm, then the eccentric wheel into the hole (Note when installing the eccentric, the eccentric surface has an arrow indicating the direction to align the mast hole), Turn tightly clockwise so that the two intersecting plates will fit tightly. In the assembly process, the assembly is carried out face-down and face-up. If there is a space left in front of the cabinet body, the internal structure should be installed first and then be mated with the item in front of the empty height in front (generally It is to use the footboard or the closing plate), and then assemble the external plate, and finally install the footboard. Step Two: Backplane Installation After the cabinet body is assembled, the centerline used for the assembly of the backplane is marked for the intersecting panels. 1. When assembling the backboard, the angle of the cabinet body must be straightened first. In the case where the ground level is relatively horizontal, the most common method is to use the diagonal of the cabinet. Compare the drawings with the backboard on the back of the cabinet (because the seams of the backboard will be connected to the corresponding centerline of the panel in the maximum dimension during production) and then insert the backplanes on both sides into the back of the panel. In the slot, place the middle backplane. Fix the midline according to the originally planned backplane and extend it to the corresponding position on the backplane. Use a 3mm twist drill to drill a hole in the backplane screw fixing position to prevent mounting screws. When the cabinet board is cracked. (When the two backplanes are patched together, you can use a 3mm drill bit to drill holes in the gap between the two backplanes and screw them between the two backs.) 2. There are two methods for fixing the backplane with a normal peripheral board: a. half-slot; half-slot refers to a 7-shaped notch on the inner side of the back side of the outer plate, and the back plate is fixed on the half-slot with nails or screws. bU-type slot; U-shaped slot is to leave gaps in the inner side of the rear edge of the outer plate, and the back plate is inserted into the gap and clamped and fixed by both sides of the slot. The third step: erect the cabinet and post-processing 1. After the cabinet body is assembled, before putting it into the designated position, clean the position of the swinging cabinet and check whether there is unevenness at the intersection of the wall and the ground. 2. When the cabinet stands up, the ground is covered with a protective layer on the paper surface. The protective area is to reach half the position of the swinging cabinet. When the cabinet body is pushed to the designated position by 2/3, the upper part of the cabinet will be pushed obliquely to the underground paper. Peel away. (This method is for relatively heavy and large The cabinet body. ) 3, when the cabinet body is moved to the designated position of 2/3, the relatively straight side of the corresponding site shall be installed on the cabinet body by the wall closing plate, because no smooth surface can be directly fixed on the cabinet body with the self-tapping screws. Note that the seam must be flat. 4. After closing the mouth, the cabinet body will continue to move to the designated position until the front of the cabinet body meets the requirements of the pre-design. It is also possible to move the side of the cabinet to the wall. 5. When the cabinet body is in the pre-positioning position, adjust the front side and the side where the closing plate is installed, and perform the overall vertical and frontal twist and twist inspection and adjustment. If it is on both sides of the site into the wall, after the overall adjustment is completed on the other side of the closing work, (normal design is to double into the left and right sides of the wall are left with a plate thickness of the closing position.) Because can not be hidden Mounted to self-powered screws, this side of the closure is generally used quick-drying type 502 glue directly paste. The top closing plate should be cut and seamed according to the size of the left middle, right, and right three points. After the closing, glass glue should be put on the top of the connecting plate of the closing plate and the top plate and then installed. (If you have to open the door when adjusting the cabinet, you must first install the swing door and then adjust) 6. If there is a reserved power source or other items that need to be introduced into the cabinet at the site, the position of the cabinet body must be calibrated and the hole position must be opened before the cabinet body moves into the predetermined position. It is generally advisable for the customer to keep a thread or position, and then install the socket or other items in the cabinet body after the cabinet body is installed. 7. Since the entire custom-made furniture is produced by the combination of the product and the site, there will be some situations that cannot be completely in line with the site when the product is combined with the site. In this regard, the gap is generally filled with porcelain white glass glue. When playing glass glue, special attention should be paid to the formation of the surface and the cleaning of the cabinet body. The installation steps of the wardrobe are finished. How do you learn how to install it? You can not directly install the master after the sale. You may want to learn more about furniture and pay attention to the GO Home Information Channel. PRO-CHARGER CO., LTD. (VICTOR HERO HOLDINGS LTD, TIME VALUE LTD.) , https://www.pro-chargerco.com

How to install the wardrobe is how to install the wardrobe in detail